Hello my crafty friends, I hope this Monday finds you all well and ready for a new week. It is chemo today, yes usually we go on Tuesdays, but this week Tuesday was pretty booked up, so we went with a Monday. Keeping my fingers crossed that all goes well this week at chemo. Hubby seems to be doing pretty good, those fevers are few now, which is a good sign. My ribs are healing slowly. They still hurt but not like they did, but sleeping is still a challenge. I will get there though, just time is needed and I've got that.
Trying to get back into the swing of getting crafty. I don't always do well in the summer as it seems to be a lot to do in the summer. Of course this year, we are getting washed away by all the rain. We got 7 1/2 inches of rain this past week! With 3 1/4 just on Saturday! So I won't be mowing grass for a while so that is one thing off the plate. lol Although I do love to mow the grass. Anyway we have a new challenge over at BBTB2. Our talented and so sweet design team sister, Michele, gave us the challenge of making a project using a flag or banner for the upcoming holiday. Gosh, can you believe that the 4th of July is this weekend?!! Summer is flying by and I'm not ready for that. lol My card for today is very simple, but patriotic. I used the print and cut feature on my Explore for the girl and her flag. That's it, I told you it was simple. I don't have much mojo at times. lol But I think it is good enough to use for Hero mail in my OWH box. So I will write a letter in it to one of our Hero's. Now it is your turn, make anything with a flag or banner and link up with us. Can't wait to see what you all make!
As always, thanks for taking time from your busy schedule to stop by and visit me. I know I'm behind on making my rounds and I'm trying to get caught up a little each night. Have a wonderful week and thanks again for your sweet comments, they really do make my day! Crafty hugs, Brenda
Recipe:
girl and flag-Summer Celebrations
banners-Art Philosophy
sentiments and inside border-My Creative Time 4th of July Stamps
Monday, June 29, 2015
Thursday, June 25, 2015
Rudolph Day
Hello my crafty friends, sorry I have been MIA lately. I hurt my ribs right before the wedding, and then there was the wedding, visiting grandkids, a gender reveal party, chemo and of course Father's Day-busy times. Hubby had an allergic reaction to chemo this past time while getting it, scared the daylights out of me but the nurses were quick and had him back in shape. They were really awesome and kept a great eye on him while he finished up chemo. He finished his chemo and he finished up without any more reactions thank goodness.
Well I finally got into my crafty room and made a card for Rudolph day, which started today. It always starts on the 25th of each month and you have until the end of the month to link up your card. I love playing along as often as I can, it gives me some Christmas cards made ahead of time for once. lol My card is a total CASE. You can see the original card here. Mine isn't as CAS as Kristie's but I am happy with the way it came out. I fell in love with Kristie's card as soon as I saw it and so I thought I would try to CASE it. I used Lawn Fawn's Joy to the Woods stamp set, my watercolors and water color paper, hot pressed. I ordered hot pressed by mistake and then wondered what the difference was between hot and cold press watercolor paper. I found out that hot press watercolor paper is smooth and the colors sit more on top of the paper instead of absorbing into the paper thus making them look more vibrant. Cold press is textured and the watercolors absorb more into the paper. Both are neat and can have a place in the craft room. So it was a happy mistake, why don't you try both and see if you love them both?! So I took my watercolor paper and cut it to size to fit on my A2 card base. I taped around my paper with micro-pore tape to give a border. Then I water colored a sky background using black watercolor. I heat to dry it, then darken the upper part of the sky some more, then dried it with my heat gun. I popped up my birch trees and glued my cardinal down flat on the birch tree. I cut my "merry" out and glued it down. My "Christmas" was stamped with the rotary alpha stamp by SU. I was a little sloppy with it, I really need to practice using it. lol And I got some black ink underneath my sentiment, so I took a red Spectrum Noir maker and made a red line at the bottom of my card as well as on the inside. I want to see how a few silver stars will look yet in the sky, so may add some of them later. But that is about it. My CASE'd card. I hope you like my little CASE'd card and I want to thank you for popping by for a visit today. It always makes my day when you visit me and I love your sweet, sweet comments! I am going to try and get some wedding pics uploaded as well as the results from the gender reveal party. Crafty hugs, Brenda
Recipe:
Lawn Fawn, Joy to the Woods
My Creative Time, Boughs of Holly
hot press watercolor paper
Loi Water colors Pocket Field Sketch Box
Wednesday, June 10, 2015
Wedding Projects
Hello my crafty friends, I hope this hump day finds you all well and looking forward to the upcoming weekend. Hubby has been working some, so that is a good thing to see him feel well enough to go to work! His fevers are gone on some days and come back on others, but I think the treatments are working to completely get rid of them, which makes me very happy. So hubby is hanging in here pretty good, of course this is his free week from chemo, back at it all over again next week.
As you know, our #4 son is getting married this Saturday. I was asked by the bride and groom to make some things for them. First they wanted table numbers done up. I was given a picture of some she saw on Pinterest. You can see them here. So I got to designing on Design Space and used my Cricut Explore to print and cut the table number mat. I hand lined around the mat using a black marker. I used the Cricut cart Calligraphy for my font. I used SU paper to make the "tent" base and added silver glitter paper as the "ribbon". Cut the peacock feathers and adhered everything down. Here is my version, not bad eh?!!
Next I was show a picture of some Unity candles, the happy couple wanted their Monogram on the candles in vinyl. So I got to work! You can see the candles I was shown here from Amazon. And here is my version using a font from the computer:
And finally this was my bridal shower gift to the bride to be. The frame came from Hobby Lobby using a 40% off coupon. And the SVG file came from SVG Attic. The font is the same font I used on the table number mats, Calligraphy.
The happy couple were very happy with their wedding goodies that I did for them. They both loved the Monogram frame, which made me very happy. lol
I hope you have enjoyed seeing my wedding items. And as always I appreciate you taking time from your busy day to visit me. Your comments always make my day! Crafty hugs, Brenda
Monday, June 1, 2015
Wedding Time! - BBTB2 Challenge
Hi my crafty friends, I hope your Monday is off to a great start! Hubby went to work this morning so that is a good thing. He has been doing half days for now. Tomorrow is chemo day so he won't go back in to work until Friday. His pump will be put on tomorrow afternoon and will come off on Thursday afternoon. He always feels like he has been freed from prison when that pump comes off. lol Anyway enough chatter, lets get on with it.
Our sweet design team sister, Kelly, gave us the challenge to make a wedding or anniversary project for this week at BBTB2. This challenge comes at a good time for me as we have a son getting married on June 13th. I got my inspiration from this card on Pinterest. The Cricut cartridges I used on my card are George and Basic Shapes for the lettering and Bits and Pieces for the hearts. It was a very simple card to make and didn't take long at all. I sized everything in Design Studio and then cut it out. Easy peasy! I used stickles on the hearts that aren't embossed and on the letters as well. In real life it sparkles so pretty! I using Swiss Dots embossing folder on some hearts and the top of my card. I also popped up each of the larger hearts with the smaller heart glued on the larger heart. The layers are popped up on foam tape as well with the Mr and Mrs glue directly to the card base. So what do you think of my white on white wedding card? Now it is your turn, go check out what inspiration my design team sisters have for you and then you make a wedding project and link up with us! I can't wait to see what you make!
As always, I appreciated you taking time from your busy day to visit me. Your comments always make my day that much brighter!! Crafty hugs, Brenda
Our sweet design team sister, Kelly, gave us the challenge to make a wedding or anniversary project for this week at BBTB2. This challenge comes at a good time for me as we have a son getting married on June 13th. I got my inspiration from this card on Pinterest. The Cricut cartridges I used on my card are George and Basic Shapes for the lettering and Bits and Pieces for the hearts. It was a very simple card to make and didn't take long at all. I sized everything in Design Studio and then cut it out. Easy peasy! I used stickles on the hearts that aren't embossed and on the letters as well. In real life it sparkles so pretty! I using Swiss Dots embossing folder on some hearts and the top of my card. I also popped up each of the larger hearts with the smaller heart glued on the larger heart. The layers are popped up on foam tape as well with the Mr and Mrs glue directly to the card base. So what do you think of my white on white wedding card? Now it is your turn, go check out what inspiration my design team sisters have for you and then you make a wedding project and link up with us! I can't wait to see what you make!
As always, I appreciated you taking time from your busy day to visit me. Your comments always make my day that much brighter!! Crafty hugs, Brenda
Friday, May 29, 2015
Rudolph Day
Hi my crafty friends, I have two Christmas cards I wanted to share with you. The first one I'm entering in the Rudolph Day challenge. Rudolph Day always starts on the 25th of each month and ends on the last day of that same month. So it is always fun to play along so I will have a nice stash of Christmas cards when the time comes. For this Rudolph Day card, I used a stencil from Stamplorations that I won over at Darnell's NBUS challenge one time. I used white embossing paste with the tree stencil, it actually has to trees in this stencil! Then I put SU gold embossing powder on it. Let it dry and then heated the gold. I popped it up on foam tape to my card base. I need a little more practice with getting the embossing paste smooth. lol I did the sentiment the in the same embossing paste. Just a very simple CAS card.
For my second card, I was going to enter it into the Muse Christmas Vision challenge, but of course I didn't get the card photograph so it didn't get entered. But I did play along! So that makes two more Christmas cards for my stash. For this one I used a SU stamp set, added some stickles and some Wink of Stella to the pine cone and needles. I also moved the pine needles just a smidgen and re-stamped with white ink to make the pine needles not so stark looking. Not sure I like it though, but it is done, so it is staying that way. lol Nothing really to this one either. Cut my ovals using a My Creative Time die. Just easy peasy, plain Jane.
Thanks for taking the time from your busy day and visiting me. I so love when you do and your comments always lift my spirits! Crafty hugs, Brenda
For my second card, I was going to enter it into the Muse Christmas Vision challenge, but of course I didn't get the card photograph so it didn't get entered. But I did play along! So that makes two more Christmas cards for my stash. For this one I used a SU stamp set, added some stickles and some Wink of Stella to the pine cone and needles. I also moved the pine needles just a smidgen and re-stamped with white ink to make the pine needles not so stark looking. Not sure I like it though, but it is done, so it is staying that way. lol Nothing really to this one either. Cut my ovals using a My Creative Time die. Just easy peasy, plain Jane.
Thanks for taking the time from your busy day and visiting me. I so love when you do and your comments always lift my spirits! Crafty hugs, Brenda
Monday, May 25, 2015
Dance Like No One's Watching-BBTB2 Challenge
Hello my crafty friends, since hubby's fever has come down and he has started treatments again, I decided to get back on my DT. I have missed crafting and I'm rusty to say the least, but hopefully I will get back in the swing of things. Hubby's last chemo treatment was rough on him. He was feeling a little sick while getting treatment so the nurse gave him some saltines to nibble on. Got home and he promptly ran to the bathroom. I felt so bad for him. Then the nurse and pharmacy got here to get hubby's pump placed on. The pharmacy delivered the meds and then left and then the nurse got hubby set up with his pump. No sooner than she got it on him than he was back in the bathroom. When he came out he was so white, his lips were so white and it was a little scary to see. His heart rate was up of course so the nurse said she wasn't leaving until his rate was back down. So I got him settle in his recliner, covered him up because he was freezing and the nurse checked him a little later. His heart rate was back down so she left and he rested. The next morning he felt good to go so I was a thankful wife!
Today over at BBTB2 our challenge was issued by our our sweet design team sister, Emily. Her little girl is going to be starting dance soon so that is our theme, dance. I didn't know where I was going to go with this challenge. But in the end this is what I came up with. My dancing girl comes from the Cricut cartridge Shall We Dance. My mat is from Elegant Edges and I had my Explore write my sentiment using the Quarter Note cartridge. I punched a Martha Stewart butterfly and two smaller butterflies using a Studio G punch. I added some pearls and called it done. Let's see your dance projects and make sure to use your Cricut cartridges. Can't wait to see what you do.
Thank you for taking time from your busy day to visit me, I always love to read your sweet comments-they always make my day! Crafty hugs, Brenda
Today over at BBTB2 our challenge was issued by our our sweet design team sister, Emily. Her little girl is going to be starting dance soon so that is our theme, dance. I didn't know where I was going to go with this challenge. But in the end this is what I came up with. My dancing girl comes from the Cricut cartridge Shall We Dance. My mat is from Elegant Edges and I had my Explore write my sentiment using the Quarter Note cartridge. I punched a Martha Stewart butterfly and two smaller butterflies using a Studio G punch. I added some pearls and called it done. Let's see your dance projects and make sure to use your Cricut cartridges. Can't wait to see what you do.
Thank you for taking time from your busy day to visit me, I always love to read your sweet comments-they always make my day! Crafty hugs, Brenda
Wednesday, May 20, 2015
Get Well Soon!-Cardz TV Gallery
Hello my crafty friends, hubby's fevers are doing much better. He still has a low fever, but at least it isn't 104 anymore. Today is chemo day, so I am sitting beside hubby while he gets his treatment. I dare say I think they are working on the tumors and that is why the fevers have came down. It's so nice to have him feeling better now and he even has been going into work for a half a day this week as well as getting the planting done on the farm finally! That made my heart sing when he got out on the tractor. Farming is his passion, so when he wasn't feeling well enough to even farm, I knew it was bad. So things are going pretty good and I attribute that to all of the prayers from you and others!! I am coming back to crafting and my design teams and it feels good to know we are getting back to a kinda' normal routine again. So thank you from the bottom of my heart for your prayers!
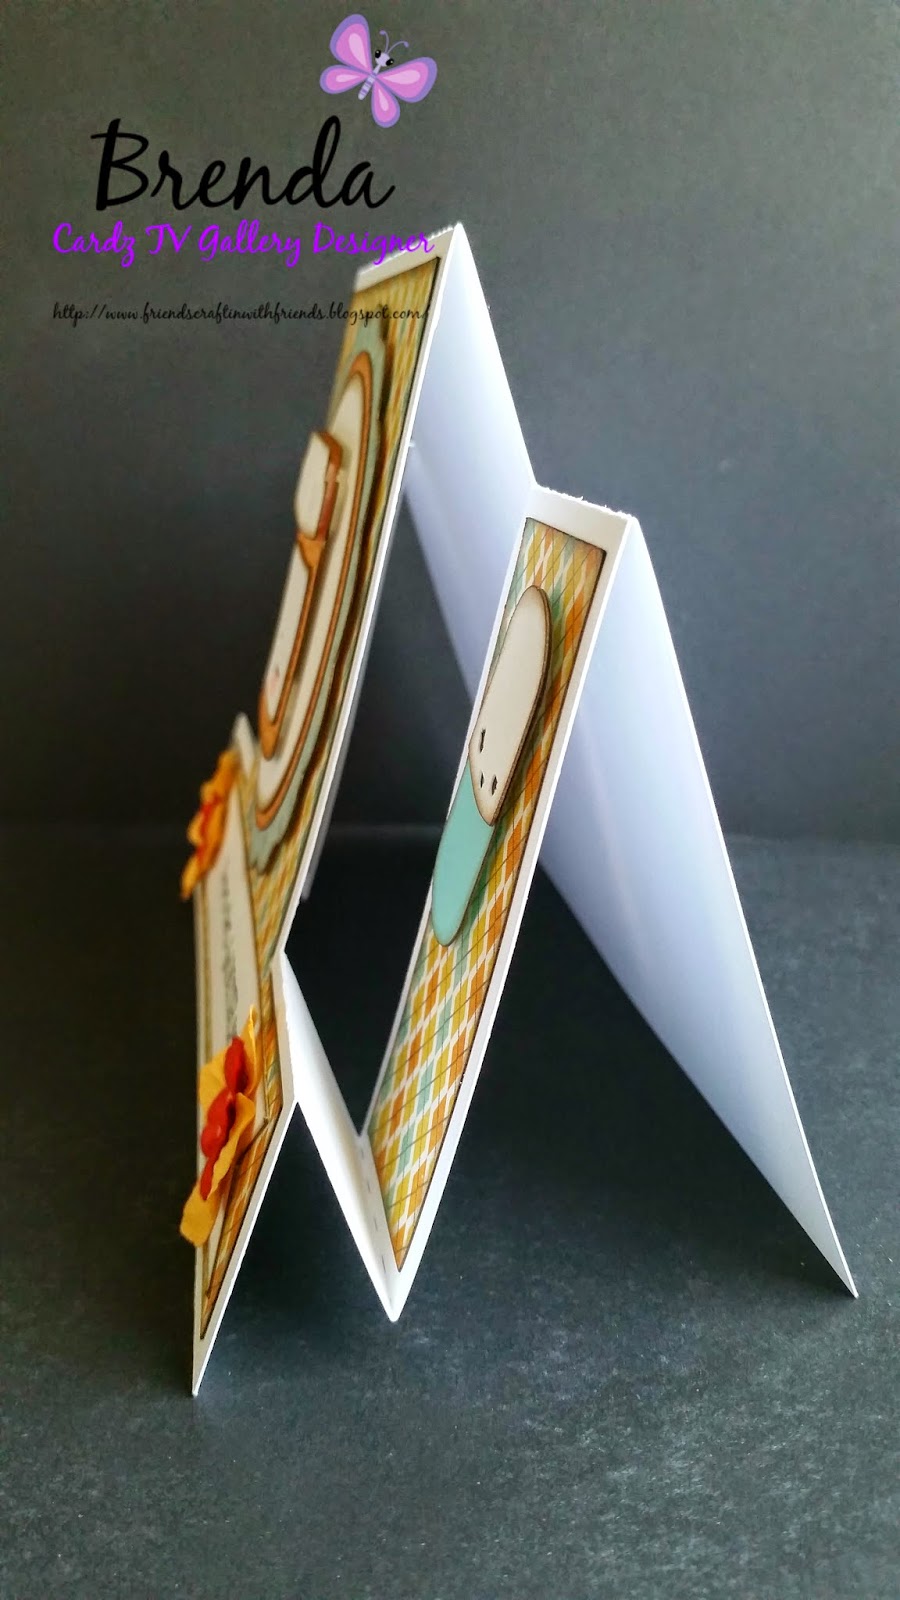
Today it is my turn to post over at the Cardz TV Gallery. I am using the Cardz TV stamp set called Mixed Messages and you can get this stamp set here. There are a lot of great sentiments on this set, the one I'm using today is "doctor's orders...feel better soon" for a get well card. The SVG files I used are from Pretty Paper, Pretty Ribbon. The center step card base, layers and the cute pills and pill bottle all came from there. These SVG files pare together with Mary's stamp set perfectly! Thanks for stopping by today and make sure to stop back the rest of the week at Cardz TV Gallery for some awesome projects from my design team sisters!! As always thank you for taking time out of your busy day to visit me. Your comments always make my day!! Crafty hugs, Brenda
Subscribe to:
Posts (Atom)